Extension - Use Microsoft Word to Draw Lines
Type or select your answer, then press "Check".
After a correct answer, click the => to advance to the next question.
After a correct answer, click the => to advance to the next question.
- Minimize this window
Open Word
Then click this application on the task bar to restore this page.- It's done

Look on your task bar. You should see "Document1 - Microsoft..." as one of the choices. Multitasking will require you to switch back and forth between files.- OK
- You could try resizing the windows so that you can view both applications at the same time. Or you can read this one then click "Document1 - Microsoft.." on the task bar to complete your assignments.
- OK
- Today we will be using Microsoft Word to draw and label lines. You will also learn advanced positioning and review grouping objects. These skills assume that you are a master of 7.1 - Draw and Label Points. If you have not completed that activity, please click the link above before continuing.
- I have completed 7.1 - Draw and Label Points.
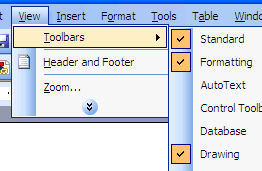 We need to make sure that all of us are looking at the same toolbars. You will want to use the "Drawing" toolbar today, so let's make sure you have it turned on.
1. Click "View" on the menu bar.
2. Choose "Toolbars"
3. Check to make sure "Drawing" is selected as shown on the right.- It is selected

In most cases, the drawing toolbar will be docked at the bottom of your window. Look at the Word window and find out where this toolbar is.- I found it!

Click the lines icon on the "Drawing Toolbar".
The "Drawing Canvas" will appear and your cursor will turn into a cross.
Word is ready for you to draw the line.- Ready

To draw a straight line...- Click somewhere in the drawing canvas and drag horizontally across
- Hold down the shift key on the keyboard to make sure the line is straight.
- My line is straight
- It will be important that your line matches mine, so we will need to format and position our lines. To open the format AutoShape Wizard you can use any method you like.
- Double Click the line or...
- Right Click the line or...
- select "Format" from the menu bar and choose "AutoShape"
- I have activated the AutoShape
- I am only offered chances to format the Drawing Canvas
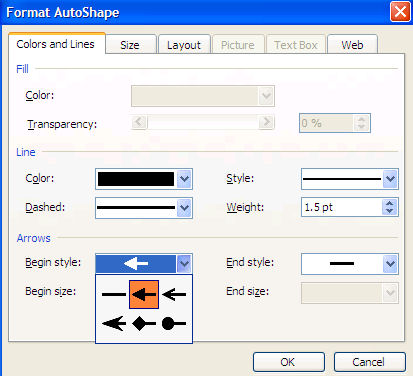
We will change the Line weight, Arrow begin style and end style from the colors and lines tab.- Start by changing the weight to 1.5.
- Use the drop down arrow to change the Arrow Begin style to the first arrow as shown in the picture.
- Use the drop down arrow to change the Arrow End style to the same style as you chose above.
- Do NOT click OK - we still need to work on the Layout
- My weight is 1.5 and arrows are proper!
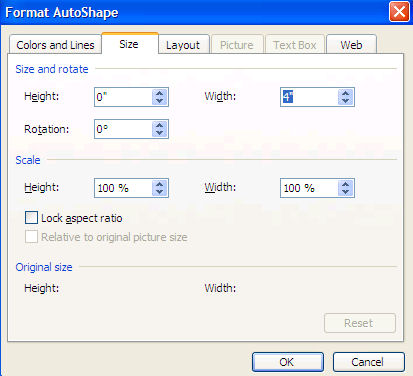
Select the "Size" tab and change the width to 4".- Simple
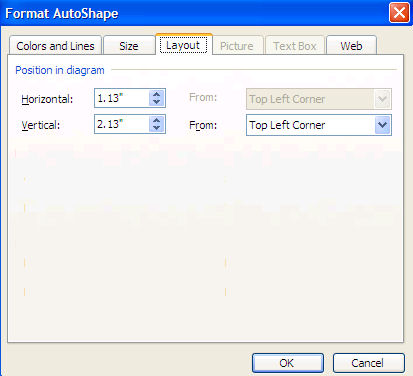
Select the "Layout" tab- Change the horizontal to 1"
- Change the vertical to 2"
- Choose OK to apply the format changes to your line.
- Finished
- Now comes the tricky part. We want to put some points on this line.
- Use the "oval tool to create a point.
- Change the Fill Color to black.
- Click the Size tab.
- Change the Height to .1 and the Width to .1
- Press OK to apply the formatting.
- I have made a point.
- Use the "oval tool to create a point.

Drag the point as close to the line as you can.- Fine
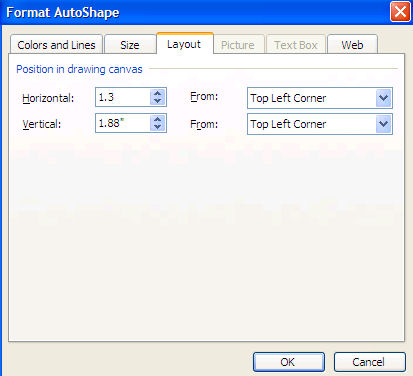
You can carefully move the point and place it perfectly on the line. The secret is careful increments.- Start the Format AutoShape wizard and switch to the Layout tab.
- The Horizontal doesn't matter much for this point so just switch it to 1.3 so we will have the same.
- OK
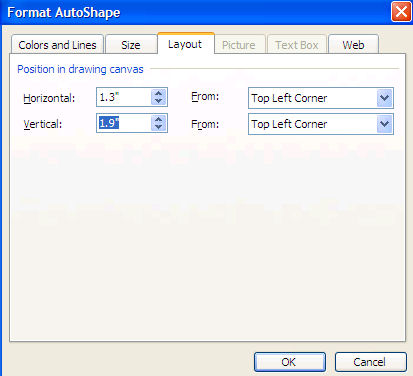
We need to move the point down a little bit so we will start by changing the Vertical to 1.9.- Press OK and see if you are on the line!
- We need to get a little farther down. Here is where the careful increments matters. You must be patient and move slowly. The actual answer is going to be 1.95, but .5 is a large increment!
- Open the Format AutoShape Wizard
- Change the Vertical to 1.92.
- Press OK and see if you are on the line!
- We are getting closer but still need to get a little farther down.
- Open the Format AutoShape Wizard
- Change the Vertical to 1.94.
- Press OK and see if you are on the line!
- That almost looks perfect. We need to move down just a little more.
- Open the Format AutoShape Wizard
- Change the Vertical to 1.95.
- Press OK and you will be on the line!

Now we know that our line is Vertical 1.95!- Create a new point.
- Set the Horizontal to 4.5
- Set the Vertical to 1.95.
- My line looks good!
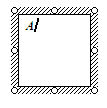 Now we need to label the points and group the objects. We will start by labeling the points as A and B.
- Click the Text Box icon and create a text box.
- Type A
- Format Font - "Bold Italic"
- I remember now
- We need to format the text box so that it is invisible.
- Right Click the text box and choose Format Text Box
- On the Colors and Lines tab...
- Change the Fill Color to No Fill
- Change the Line Color to No Line.
- On the Size tab
- Change the Height to .3
- Change the Width to .3
- Click OK to apply the formatting changes.
- Move the text box to label the first point.

- Fine

- Copy the text box.
- Paste the text box.
- Move the text box to label the other point.
- Change the A to B.
- Perfect!
- Remember to group objects, you need to hold down the shift key.
Hold the shift key and click both text boxes, both points and the line!
- I have them
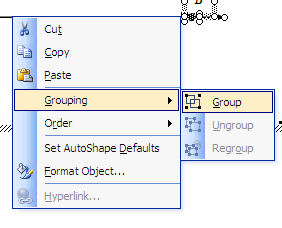 Right click the line
- Choose Grouping
- Choose Grouped
- The objects are grouped!

Congratulations, you have a line!
Move it around a little and see that it is a single object and looks good.- OK
- Now you can practice by creating rays and line segments.
Do Not use the arrow style tools as a shortcut since the point that they make will not be congruent with the additional points that you will need to add to the rays.- I understand
- Finally, put your name on your paper!
- Click View on the menu bar.
- Choose Header and Footer
- Write and Format your name!
- All done
