Extension - Use Microsoft Word to Draw Points
Type or select your answer, then press "Check".
After a correct answer, click the => to advance to the next question.
After a correct answer, click the => to advance to the next question.
- To Start...
- Minimize this window.
- Open Microsoft Word.
- Then click this application on the task bar to restore this page.
- It's done

Look on your task bar. You should see "Document1 - Microsoft..." as one of the choices. Multitasking will require you to switch back and forth between files.- OK
- You could try resizing the windows so that you can view both applications at the same time. Or you can read this one then click "Document1 - Microsoft.." on the task bar to complete your assignments.
- OK
- Today we will be using Microsoft Word to draw and label points. You will also learn how to group objects. These skills will be the base skills for the advanced lessons to come.
- Proceed
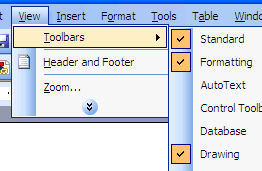 We need to make sure that all of us are looking at the same toolbars. You will want to use the "Drawing" toolbar today, so let's make sure you have it turned on.
- Click "View" on the menu bar.
- Choose "Toolbars"
- Check to make sure "Drawing" is selected as shown on the right.
- It is selected.

In most cases, the drawing toolbar will be docked at the bottom of your window. Look at the Word window and find out where this toolbar is.- I found it!

We will start by creating a point.
Look on the "drawing toolbar" and find the Oval.- Easily Done
 When you click the "Oval", the Drawing Canvas will appear. The drawing canvas is an area where you can draw multiple shapes. Then you can move them or delete them as a unit.
- I see it
 Click in the middle of the Drawing Canvas to create a circle.
- I have a good circle
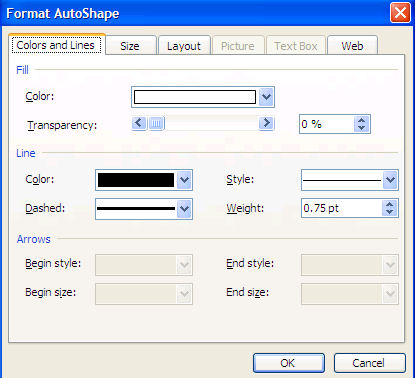 Now we will turn the circle into a point by formatting it.
Double Click the center of the circle to open the "Format AutoShape" Wizard.- I'm there
 Points are generally solid black circles.
Use the drop down arrow beside "Fill Color" and change the color to black as shown on the right.- My Fill Color is black.
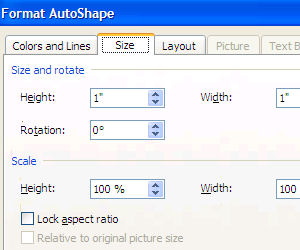 Now we need to make the point small. We will need to change the size of our circle.
Click the size tab on the Format AutoShape Wizard to begin working with size.- I'm there.
- I have found that [Height = .1"] and [Width = .1"] makes a perfect point.
- Click in the text box next to Height and change the value to ".1"
- Click in the text box next to Width and change the value to ".1"
- Click "OK to apply the format changes to your circle.
- I have made

- Now we will label the point. You will need to use a text box to name the point. Look at the Drawing Toolbar and find the "Text Box" as shown below.

- I found it.
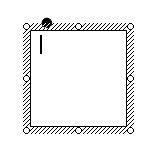 Select the Text Box button and click in the Drawing Canvas to create a text box.
- Don't worry if your point disappears!
- The text box has been created.
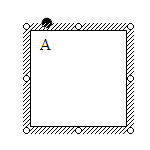 We will format the text box in a few steps - but first we need to go ahead and put the text in the box.
- Press the shift key and type a capital A in the text box.
- OK
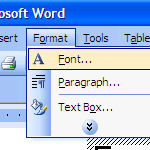 Point labels are generally capital letters and italicized. We need to format the font of our "A" so that it is in italics.
- Double Click the A to select the text.
- Select "format from the menu bar.
- Select "font"
- The Font Formatting wizard should appear.
- I see the wizard
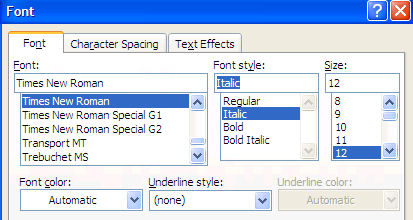 Change the "Font Style" to "Italic" or "Bold Italic" and choose "OK" to apply the changes to your font.
- It's done
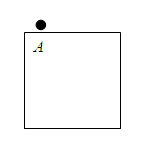 We need to make the text box "invisible".
- Right now it has a white background (fill) and a line around the outside.
- It may even be hiding the point that you made earlier!
- Are you ready to fix it up?
- Let's go!
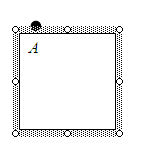 Click anywhere on the text box line to cause the text box to be "selected" as shown in the picture.
- OK
- There are two easy ways to open the "Format Text Box" wizard.
- You can double click on the text box's line
- or you can choose Format and "Text Box" from the menu bar.
- I double clicked.
- I chose Format and "Text Box" from the menu bar.
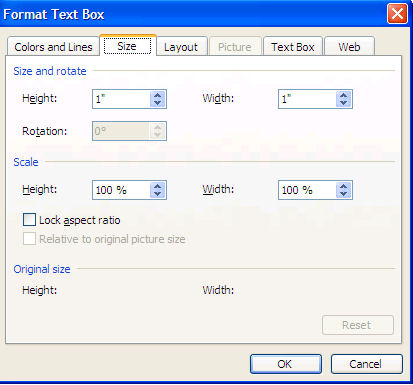 My wizard opened to the size tab. Make sure your wizard is showing the size options as shown in the picture.
- I'm ready
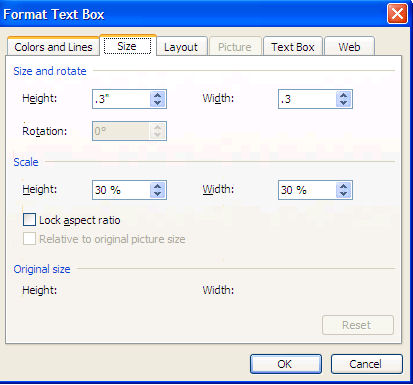 Change the both the "Height" and "Width" to .3".
Then select the "Colors and Lines tab to begin changing the fill and line options.- OK
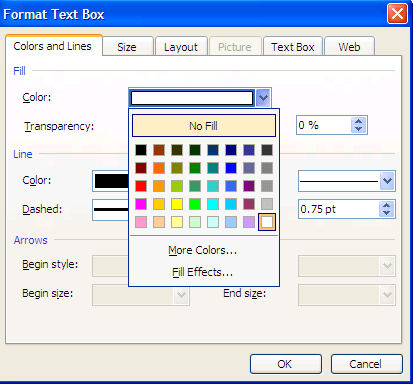 To make the text box "invisible" ...
- Change the "Fill Color" to "No Fill"
- Then change the "Line Color" to "No Line"
- Click OK to apply the changes to your text box.
 You can move the text box anywhere you want.
- Hover your mouse over the edge of the box until it turns into the 4-way arrow.
- Click the box and drag it around the page.
- I would like you to drop the box on the point as shown in the picture on the right.
- No problem
- You have created and labeled a point! Now we will "group" the objects so that the point and its label are one object instead of 2.
- OK
- This move calls for careful attention. You will need to notice the difference between a normal curser arrow (1:00) and a reversed arrow (11:00). In some versions of Word, you will not get the reversed arrow - you will be looking for the four way selecting arrow.
- Hover your mouse around the left side of the "A" until you have seen both types of selecting arrows.
- Click a few times to see the results of each arrow.
- You should discover that the 11:00 arrow doesn't do much but that the 1:00 arrow will cause the text box to be selected.
- Make sure to click away to deselect the objects before moving to the next step.
- Practice selecting and deselecting the text box until you are a master.
- OK
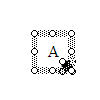 To select both the point and the text box...
- Click the "point" to select it.
- Hold down the shift key on your keyboard.
- Hover your arrow to the left side of the A until the 1:00 arrow lets you know that you can select the text box.
- While holding the shift key click to select the text box.
- You should have both objects selected as shown in the picture on the right.
- I have them both
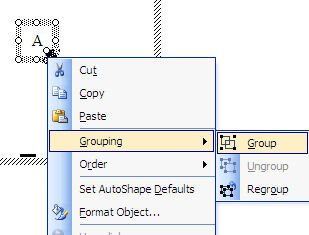 Now hover over the selected group until your curser becomes a 4-way arrow.
- Right Click the object to open the submenu shown on the right.
- Select Grouping
- and Choose Grouped.
- OK
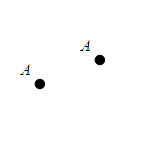 It's done! You have created a point and labeled it.
- You can drag the grouped object around and it will stay the same.
- Drag your point outside of the drawing canvas and drop it.
- Right click your point and copy it.
- Paste a new point and then move it away so that you can see both.
- Highlight one of the "A's" and change it to B.
- Add some more points.
- Repeat this tutorial until you are a master.
- Finished
| © 2010 Norm Mitchell. All Rights Reserved | Legal | Privacy | COPPA | | Site Map | Search | Contact | Help |
